how to format usb macbook air Using Disk Utility
Table of Contents
You plug your USB drive into your MacBook Air, ready to transfer files, and nothing happens. Or worse — you can copy files onto it, but the drive is completely unreadable on your friend’s Windows PC. Sound familiar? Formatting a USB drive on MacBook Air is the solution to both of these headaches, and it’s far simpler than most people expect. Whether you need a Mac-only drive, a cross-platform workaround, or just a clean wipe of a corrupted stick, macOS Disk Utility handles it all — and this guide shows you exactly how.
Why You Need to Format USB on MacBook Air
Formatting isn’t just for fixing broken drives. Here are the most common reasons you might need to format USB MacBook Air users deal with regularly:
- USB drive shows as read-only on Mac — often because it’s formatted as NTFS (Windows default)
- Drive not recognized at all — may indicate corruption fixable through reformatting
- Preparing a drive for Time Machine backups — requires a Mac-compatible format
- Setting up a bootable macOS installer — requires a specific format and partition scheme
- Clearing personal data before giving a drive to someone else
- Switching from Windows-only to cross-platform use
Understanding USB File Formats on Mac
Before you format anything, you need to choose the right format. This is the most important decision in the whole process, and getting it wrong means either losing compatibility or limiting functionality.
| Format | Best For | Mac Read | Mac Write | Windows Compatible |
|---|---|---|---|---|
| APFS | Mac-only, modern SSDs | ✅ | ✅ | ❌ |
| Mac OS Extended (HFS+) | Mac-only, HDDs & older drives | ✅ | ✅ | ❌ |
| ExFAT | Mac + Windows, large files | ✅ | ✅ | ✅ |
| FAT32 | Universal, older devices | ✅ | ✅ | ✅ |
| NTFS | Windows-only | ✅ (read only) | ❌ | ✅ |
The bottom line: If you only use the drive with your Mac, choose APFS (for fast modern USB drives) or Mac OS Extended (for older or slower drives). If you need the drive to work on both Mac and Windows, choose ExFAT — it handles files of any size and works natively on both platforms. Avoid FAT32 unless you need compatibility with very old devices, as it has a 4GB file size limit.
How to Format USB MacBook Air Using Disk Utility — Step-by-Step
Step 1 — Connect Your USB Drive
Insert the USB drive into any available USB-A or USB-C port on your MacBook Air. If your MacBook Air only has USB-C ports (all M1, M2, M3 models), you’ll need a USB-C to USB-A adapter or a USB-C flash drive.
Wait a moment for the drive to appear on your desktop or in Finder’s sidebar under “Locations.”
Step 2 — Open Disk Utility
You have three quick ways to get there:
- Finder path: Finder > Applications > Utilities > Disk Utility
- Spotlight: Press Command + Space, type “Disk Utility,” press Enter
- Launchpad: Open Launchpad, navigate to the Other folder, click Disk Utility
Step 3 — Select Your USB Drive Correctly
This step is critical. In Disk Utility’s sidebar, you’ll see your drives listed. Each drive shows the physical device at the top, with its volume(s) indented beneath it.
Always click the top-level drive (the physical device), not the volume beneath it. Selecting the volume limits your formatting options. Selecting the drive itself gives you full control.
Identify your USB drive by its name and storage capacity. Double-check before proceeding — selecting your Mac’s internal drive (Macintosh HD) by mistake would be catastrophic.
Pro tip: If you don’t see your USB drive in the sidebar, go to View > Show All Devices in the Disk Utility menu bar.
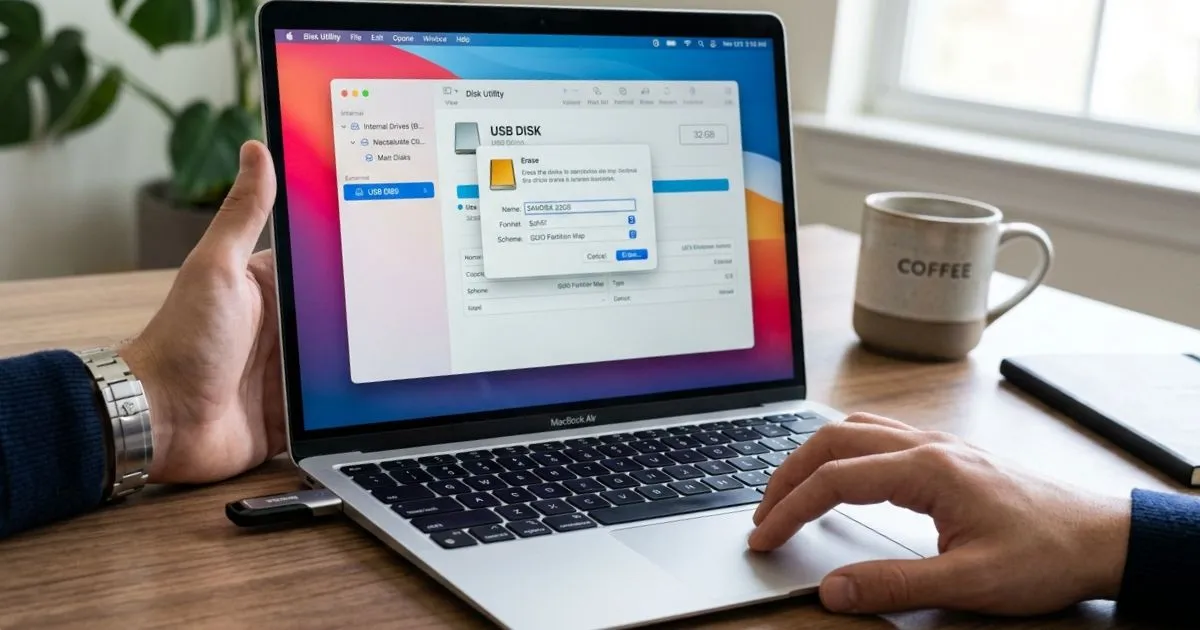
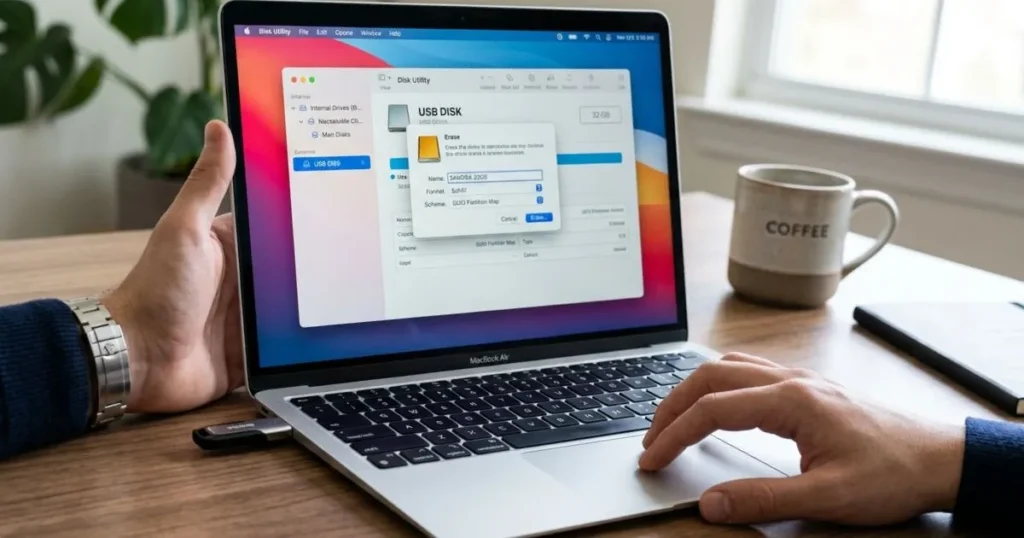
Step 4 — Click Erase and Choose Your Format
- After selecting your USB drive, click the Erase button located at the top of the Disk Utility window.
- A dialog box appears — enter a name for your drive (e.g., “MyUSB” or “BackupDrive”)
- Click the Format dropdown and select your desired format (ExFAT for most users)
- Click the Scheme dropdown — choose GUID Partition Map for Mac-compatible drives, or Master Boot Record for maximum Windows compatibility
Step 5 — Confirm and Wait
Click Erase to begin the process. The formatting usually completes within 30–60 seconds for most flash drives. Once done, click Done — your freshly formatted USB drive is ready to use.
How to Format USB MacBook Air for Windows Compatibility
If your drive needs to work seamlessly between Mac and Windows, ExFAT is your best friend. Here’s why it wins over FAT32:
- No file size limit (FAT32 caps files at 4GB, which is a problem for video files or large backups)
- Supported natively on macOS, Windows 10/11, and most modern Linux distributions
- Fast read and write speeds on both platforms
After formatting as ExFAT, test it: copy a file from your Mac to the USB drive, then plug it into a Windows machine. It should appear immediately in File Explorer with full read-write access.
How to Format USB MacBook Air Using Terminal (Advanced)
If you’re comfortable with command-line tools, Terminal gives you precise control:
- Open Terminal (Applications > Utilities > Terminal)
- Run
diskutil listto see all connected drives and identify your USB drive (e.g.,/dev/disk2) - Run the erase command:
diskutil eraseDisk ExFAT MYUSB /dev/disk2
Replace ExFAT with your desired format, MYUSB with your preferred name, and /dev/disk2 with the correct identifier from step 2. Never run this command on /dev/disk0 or /dev/disk1 — those are typically your Mac’s internal drives.
Troubleshooting: USB Not Showing in Disk Utility on MacBook Air
If your drive doesn’t appear in Disk Utility, work through these checks:
- Try a different USB port or adapter — a faulty port or adapter is a common culprit
- Restart your MacBook Air with the USB drive already connected
- Enable “Show All Devices” in Disk Utility’s View menu
- Test the USB drive on another computer to rule out physical damage
- Try a different cable if you’re using an external drive with a separate cable
If the drive appears grayed out in Disk Utility and can’t be selected, it may have a hardware failure. At that point, data recovery software (like Disk Drill) may be worth exploring before you give up on the drive entirely.
After Formatting — How to Use Your USB Drive on MacBook Air
With your drive freshly formatted, here’s how to make the most of it:
- Transfer files: Simply drag and drop from Finder to the USB drive icon
- Create a bootable macOS drive: Use Terminal’s
createinstallmediacommand with your downloaded macOS installer - Set up Time Machine: Connect the drive, open System Settings > General > Time Machine, and add the drive as a backup destination (requires Mac OS Extended format)
- Eject safely: Always right-click the drive in Finder and select Eject before physically removing it. Yanking it out without ejecting risks corrupting the file system
Conclusion
Formatting a USB drive on your MacBook Air is one of those skills that pays dividends every time. Whether you’re solving a compatibility issue, setting up a backup drive, or just starting fresh with a clean slate, Disk Utility makes the process accessible to everyone. Choose the right format for your use case — ExFAT for cross-platform, APFS or HFS+ for Mac-only — follow the steps in this guide, and your USB drive will work exactly the way you need it to.
FAQ: How to Format USB MacBook Air
1. How do I format a USB drive on MacBook Air without losing important data? You can’t format and keep existing data simultaneously — formatting erases everything. Before you format, copy all important files to your Mac’s internal storage or another drive. Once the format is complete, transfer the files back.
2. What is the best format for a USB drive on MacBook Air? ExFAT is the best all-around choice for most users because it works on both Mac and Windows without file size restrictions. If you only use the drive with your Mac, APFS offers better performance on modern flash drives.
3. Why is my USB drive not showing up in Disk Utility on MacBook Air? Try a different port, restart with the drive connected, and enable “Show All Devices” in Disk Utility’s View menu. If it still doesn’t appear, the drive may have a hardware failure.
4. How to format USB MacBook Air for both Mac and Windows use? Choose ExFAT as your format and Master Boot Record as the partition scheme in Disk Utility’s Erase dialog. This combination ensures full read-write access on both macOS and Windows.
5. Can I format a write-protected USB drive on MacBook Air? Some USB drives feature a physical write-protection switch on the side—make sure to slide it to the unlocked position before use.If the drive is write-protected through software or hardware failure, Disk Utility may not be able to override it.
💬 Did this solve your USB problem? Share this article with anyone dealing with frustrating Mac-Windows compatibility issues. And if you have a formatting tip or ran into an issue not covered here, leave a comment — your experience might help someone else!