How to Check Specs on PC (Complete Beginner Guide)
Table of Contents
You are sitting there, staring at your screen. Maybe a game just told you that your system does not meet the minimum requirements. Maybe a friend asked what processor you have and you went completely blank. Or perhaps your PC has been crawling lately and someone suggested you check your RAM — and you nodded like you knew what that meant, then quietly panicked.
That moment of confusion is more common than you think. Most people use their computers every single day without ever truly knowing what is inside them. And that is completely fine — until it is not. Until you need to upgrade, troubleshoot, buy new software, or explain your setup to a technician.
This guide is here to change all of that. By the time you finish reading, you will know exactly how to check specs on PC using multiple methods, what each spec actually means, and what to do with that information once you have it. No technical background needed. Just follow along.
Why Knowing Your PC Specs Actually Matters
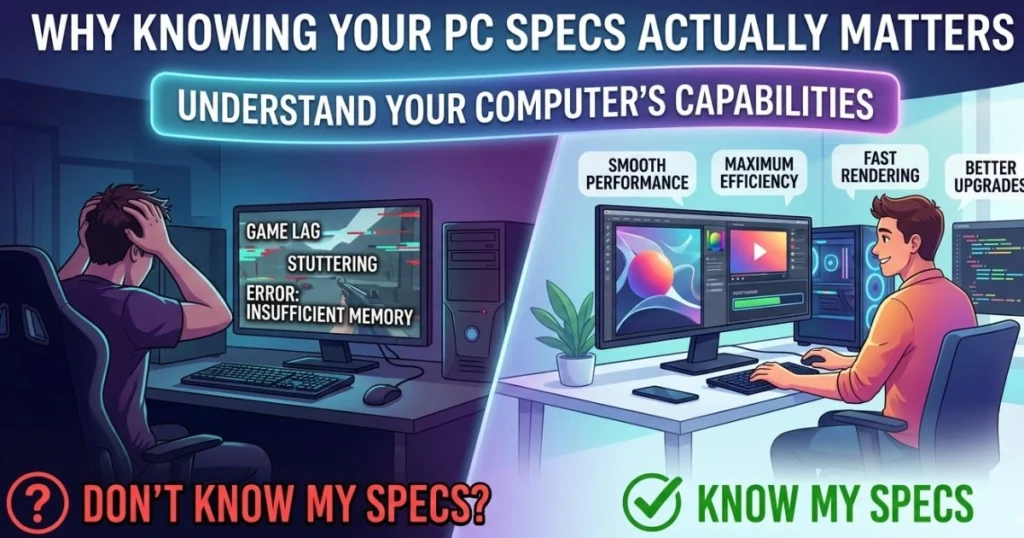
Before diving into the how, it helps to understand the why. A lot of people skip learning about their specs because it sounds like something only IT professionals need to worry about. That thinking ends up costing time and money.
Here is when knowing your specs becomes genuinely useful:
- Before installing a game or software — Every application has minimum and recommended system requirements. If your PC does not meet them, the software either will not run or will run so poorly it is not worth it.
- Before buying a hardware upgrade — If you want to add more RAM or swap to a faster SSD, you need to know what your current setup supports. Buying incompatible hardware is a frustrating and expensive mistake.
- When contacting tech support — The first thing any support agent will ask is your system information. Having it ready saves you time and makes the conversation far more productive.
- When selling or trading your PC — Buyers want to know exactly what they are getting. Accurate specs make listings more credible and help you price things fairly.
- Before a major Windows update — Some updates require specific hardware. Knowing your specs lets you confirm compatibility before committing.
The bottom line is simple: understanding what is inside your machine puts you in control of it.
What Are PC Specs? A Quick Breakdown for Beginners
“Specs” is short for specifications — the technical details of the components that make up your computer. Think of your PC as a team, where each member has a specific job. Your specs tell you who is on that team and how capable each member is.
The 6 Core Specs You Need to Know
| Spec | What It Does | Why It Matters |
|---|---|---|
| CPU (Processor) | Acts as the brain of your PC | Determines overall speed and processing power |
| RAM | Handles short-term memory | Affects how many tasks your PC can juggle at once |
| GPU (Graphics Card) | Renders visuals and graphics | Critical for gaming, video editing, and design work |
| Storage (HDD/SSD) | Stores all your files and software | Impacts how fast your PC loads and how much it holds |
| Motherboard | Connects all components together | Determines what upgrades your system supports |
| OS (Operating System) | The software foundation | Your Windows version affects compatibility and features |
You do not need to memorize all of this right now. Just knowing these six exist and what they do gives you a strong starting point.
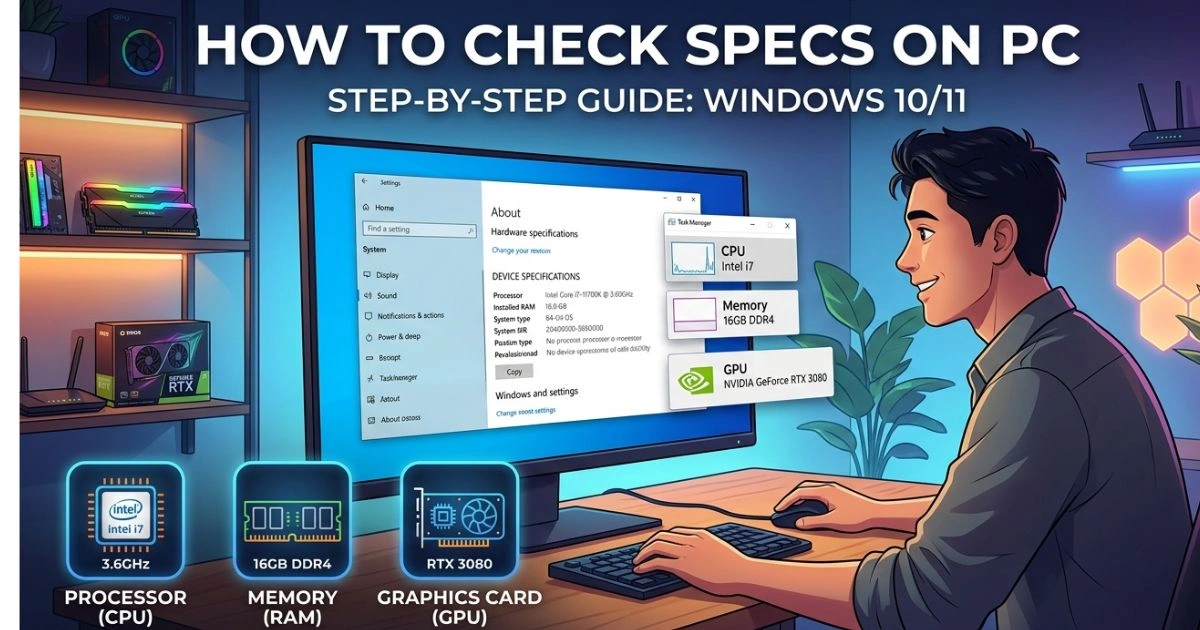
How to Check Specs on PC Using Built-In Windows Tools
The good news is that you do not need to download anything or open your PC case to find your specs. Windows comes loaded with several built-in tools that give you everything you need in minutes. Here are the five most reliable methods.
Method 1 — Using System Settings (The Easiest Way)
If you have never checked your specs before, start here. This method takes about thirty seconds and requires zero technical knowledge.
Steps:
- Press the Windows Key + I on your keyboard to open Settings
- Click on System
- Scroll down to the bottom of the left sidebar and click About
- Look under Device Specifications and Windows Specifications
What you will see here includes your processor name, the amount of installed RAM, your system type (32-bit or 64-bit), and your Windows edition and version. It is not the most detailed view, but for most everyday needs, this is more than enough.
This method works identically on both Windows 10 and Windows 11, making it the single most universal approach for any beginner.
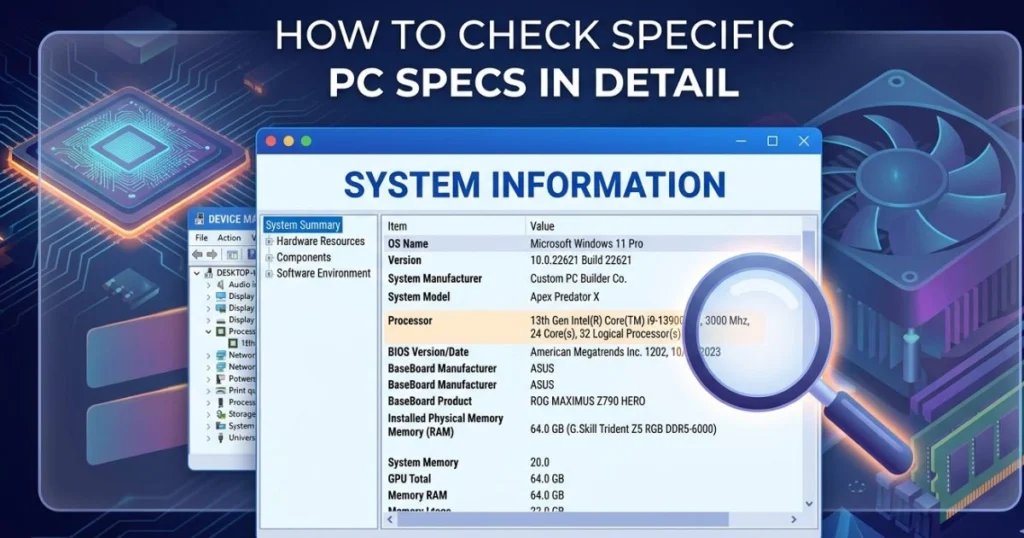
Method 2 — Using System Information (The Most Detailed View)
When you need to go deeper — say, for tech support or a detailed hardware check — the System Information tool is your best friend. It shows specs that most people do not even know exist on their machine.
Steps:
- Press Windows Key + R to open the Run dialog box
- Type msinfo32 and press Enter
- Browse the System Summary that appears
This window is packed with information: your BIOS version, the exact motherboard model, all installed hardware, system drivers, and much more. It can feel overwhelming at first, but you do not need to read everything. Just focus on the rows that match what you are looking for.
One extremely useful feature here is the ability to export your full system report. Go to File → Export and save it as a text file. This comes in handy when sharing your specs with a technician or posting for online support.
Method 3 — Using Task Manager
Task Manager is most commonly known as the tool people open when an app freezes. But its Performance tab is actually one of the most informative spec-checking tools built into Windows, especially because it shows your hardware working in real time.
Steps:
- Press Ctrl + Shift + Esc simultaneously
- Select the Performance tab at the top.
- Use the left sidebar to navigate between CPU, Memory, GPU, and Disk
What makes this method special is that you see live data — how fast your CPU is running right now, how much RAM is currently being used, and how your storage is performing under load. You also get important detail like the number of CPU cores, your RAM speed in MHz, and your GPU’s dedicated memory.
If your PC feels slow and you want to understand why, this is the first place to look.
Method 4 — Using the DirectX Diagnostic Tool (dxdiag)
This tool is especially popular among gamers because it gives a thorough breakdown of your graphics and display hardware — exactly the kind of information needed to check game compatibility.
Steps:
- Press Windows Key + R
- Type dxdiag and press Enter
- Wait a moment for it to load, then explore the tabs: System, Display, Sound, and Input
The System tab shows your processor, memory, and Windows version. The Display tab is where the real value is — it shows your graphics card name, the amount of VRAM (video memory), and the version of DirectX installed on your system.
When a game or application lists DirectX 12 as a requirement, this is the tool that tells you whether your PC has it.
Method 5 — Using Command Prompt
If you enjoy having a little more control and do not mind a text-based interface, the Command Prompt method gives you a comprehensive dump of your system information in one shot.
Steps:
- Search for CMD in the Start Menu and open it
- Enter the following command, then press Enter: systeminfo
- Wait a few seconds while the information loads
The output covers your OS version, system manufacturer, processor, total and available RAM, network adapters, and even the hotfixes currently installed on your machine. It looks technical, but you can scroll through it slowly and copy out the parts you need.
This method is particularly useful when you want to share your specs in plain text format — for example, in a forum post or a support ticket.
How to Check Specific PC Specs in Detail
Now that you know the main methods, here is a focused look at how to find each individual spec when you need it specifically.
How to Check Your CPU
Your processor details are visible in Settings → About, Task Manager → Performance → CPU, and msinfo32. Pay attention to the name, the clock speed in GHz, and the number of cores. More cores generally means better multitasking.
How to Check Your RAM
The total amount of RAM shows in Settings → About. For more depth, go to Task Manager → Performance → Memory. Here you will see not just the total gigabytes but the speed in MHz and how many memory slots are in use — crucial information if you are planning an upgrade.
How to Check Your GPU
Head to Task Manager → Performance → GPU, or use dxdiag and navigate to the Display tab. The most important numbers are the GPU model name and the VRAM amount. If gaming is your goal, VRAM is the figure to focus on.
How to Check Your Storage
Go to Settings → System → Storage for a clean visual breakdown of your drives and how much space remains. Task Manager → Performance → Disk shows how your storage is performing in real time.
How to Check Your Motherboard
Open msinfo32 and look for BaseBoard Manufacturer and BaseBoard Product. These two fields tell you who made your motherboard and what model it is — essential information when researching upgrade compatibility.
How to Check Your Windows Version
Go to Settings, then open System, select About, and view Windows Specifications. You will see your edition (Home or Pro), your version number, and your OS build. Knowing your exact build number is useful when diagnosing update-related issues.
Best Free Third-Party Tools to Check PC Specs
The built-in Windows tools are solid for most situations, but third-party applications take things a step further. If you want richer detail or a cleaner interface, these free tools are trusted by millions of users worldwide.
| Tool | Best For | Free? |
|---|---|---|
| CPU-Z | Deep CPU and RAM details | Yes |
| GPU-Z | Complete GPU information | Yes |
| Speccy | Full system overview in one screen | Yes |
| HWiNFO64 | Real-time monitoring and temperatures | Yes |
| Belarc Advisor | Full hardware and software audit | Yes |
For beginners, Speccy is the top recommendation. It presents your entire system in a clean, color-coded layout that is easy to read even if you have no technical background. Download it only from the official Piriform website to stay safe.
CPU-Z and GPU-Z are better suited once you start getting into upgrading territory — they show voltage, memory timings, and other granular details that matter when you are comparing hardware options.
How to Check PC Specs on Windows 10 vs Windows 11
One question that comes up often is whether the process differs between the two operating systems. The short answer is: barely.
| Step | Windows 10 | Windows 11 |
|---|---|---|
| Settings path | Settings → System → About | Settings → System → About |
| Task Manager layout | Classic tabbed interface | Redesigned sidebar navigation |
| dxdiag tool | Available and identical | Available and identical |
| msinfo32 | Available and identical | Available and identical |
The biggest visual difference is in Task Manager. Windows 11 introduced a redesigned version with a left-side navigation panel instead of tabs at the top. The information is the same — it just takes a moment to find things if you are used to Windows 10.
If you are not sure which version of Windows you have, go to Settings → System → About and scroll to Windows Specifications. The version number will tell you clearly.
Common Mistakes Beginners Make When Checking PC Specs
Even with the right tools, a few misconceptions tend to trip people up. Watch out for these:
- Confusing RAM with Storage — RAM (measured in GB) handles what your PC is actively doing right now. Storage (also in GB or TB) holds everything on your computer permanently. They are completely different things.
- Mistaking integrated graphics for a dedicated GPU — Many PCs use graphics built into the processor rather than a separate graphics card. If your GPU name contains “Intel HD,” “Intel UHD,” or “AMD Radeon Graphics” without a model number, you likely have integrated graphics, which is far less powerful for gaming.
- Looking at the wrong tab in Task Manager — The Processes tab shows running apps. The Performance tab shows your actual hardware. Make sure you are on the right one.
- Trusting old sticker labels — Laptops often have spec stickers on them, but these can be outdated or refer to a different configuration. Always verify through software.
- Ignoring the difference between 32-bit and 64-bit — This affects what software you can install. Most modern software requires a 64-bit system. Check under Settings → About → System Type.
What to Do After Checking Your PC Specs
Once you have your specs in front of you, the next step depends on what brought you here in the first place.
Compare Your Specs to System Requirements
Most software and games publish their minimum and recommended requirements on their official website or on platforms like Steam. Put your specs side by side with those requirements and see where you stand. Pay special attention to RAM, GPU VRAM, and available storage space.
Decide If You Need an Upgrade
If your specs are falling short, the most impactful upgrades for most users are:
- Adding more RAM — Going from 4GB to 8GB or 8GB to 16GB makes a noticeable difference in day-to-day performance
- Switching from HDD to SSD — This single upgrade dramatically speeds up startup times and application loading
- Upgrading the GPU — If gaming or creative work is your focus, a better graphics card delivers the biggest visible improvement
Always cross-check your motherboard model before purchasing any upgrade to confirm compatibility.
Share Your Specs for Tech Support
If you need to send your specs to someone, the cleanest method is using msinfo32 → File → Export. This creates a text file with your full system summary. Alternatively, Speccy lets you publish a snapshot online and share a link.
FAQ — How to Check Specs on PC
How do I check my PC specs on Windows 10? Go to Settings → System → About. Your processor, installed RAM, system type, and Windows edition are all listed there within seconds.
How to check specs on PC without opening it physically? Every method in this guide works without touching the hardware. Tools like msinfo32, dxdiag, Task Manager, and Speccy give you full details entirely through software.
How do I check my full PC specs for free? Use built-in Windows tools like msinfo32 or dxdiag, or download free third-party tools like Speccy or CPU-Z from their official websites.
How to check PC specs on Windows 11? The path is the same — Settings → System → About. Task Manager looks slightly different with a sidebar layout, but all the same information is there.
Can I check PC specs using Command Prompt? Yes. Open CMD and type systeminfo, then press Enter. You will get a full readout of your hardware and software configuration.
How do I know if my PC specs are good enough for gaming? Look up the game’s minimum and recommended requirements on Steam or the developer’s site, then compare them directly to your CPU, RAM, GPU, and available storage.
What is the easiest way to check PC specs for a complete beginner? Press Windows Key + I, go to System → About. It takes under a minute and requires no technical knowledge whatsoever.
Conclusion
There is nothing intimidating about checking your PC specs once you know where to look. Whether you use the quick Settings route, dig into msinfo32 for the full picture, or grab a free tool like Speccy for a visual overview — you now have everything you need to understand your own machine.
Knowing your specs is not just a technical exercise. It is how you make smarter decisions about your computer: what software it can handle, what upgrades are worth pursuing, and how to communicate clearly when something goes wrong.
So here is your call to action: stop reading and go check your specs right now. Open Settings → System → About and take thirty seconds to see what your PC is actually made of. Write it down, save a screenshot, or export it with msinfo32. That small step makes every future decision about your computer significantly easier.
You now know how to check specs on PC — and that knowledge is yours to keep.