How to Splice Overlay on CapCut PC (Beginner Guide)
Table of Contents
You spent an entire afternoon filming. The lighting was perfect. Your subject hit every mark. You even nailed that smooth pan shot you’ve been practicing for weeks. Then you opened CapCut on your PC, stared at the timeline, and felt that familiar sinking feeling — where do I even start?
Maybe you’ve watched a dozen YouTube tutorials that move too fast, skip the basics, or assume you already know what “overlay track” means. Maybe you’ve accidentally deleted a clip you couldn’t recover, or your overlay kept snapping to the wrong position. If any of that sounds like your experience, take a breath — this guide was written specifically for you.
By the time you finish reading, you won’t just know how to splice an overlay on CapCut PC. You’ll understand why each step works, which means you’ll be able to adapt, experiment, and troubleshoot on your own. That’s what separates someone who follows tutorials forever from someone who actually becomes a video editor.
Let’s get into it.
What Is Splicing in CapCut PC — And Why It Matters
Before touching a single button, you need to understand what splicing actually does — because a lot of beginners confuse it with deleting.
Understanding the Split Feature
Splicing, in CapCut’s language, is called splitting. When you split a clip, you’re cutting it at a precise point in time and turning one continuous segment into two independent pieces. Neither piece disappears. Nothing gets deleted. You simply create a clean break that lets you manipulate each half separately.
Think of it like cutting a piece of ribbon with scissors. You still have both pieces — you just now have the freedom to move them, trim them, replace one, or insert something between them.
This is incredibly powerful when you’re working with overlays, because you might want your overlay to appear only during a specific moment in your main video, fade out mid-scene, or switch to a completely different visual element without interrupting the footage below it.
What Happens to Your Timeline When You Splice
After you split a clip, CapCut places both halves exactly where they were — no gap, no shift. Your timeline looks almost the same, except now you have two separate segments sitting side by side.
From that point, you can:
- Delete the second half to end the clip early
- Drag one half to a new position
- Insert a new clip between the two halves
- Apply different effects, speeds, or animations to each half independently
The main thing to watch for is accidental gaps. If you move a segment and leave empty space in your timeline, your exported video will show a black frame at that moment. Always check your timeline after moving anything.
What Is an Overlay in CapCut PC — Explained Simply
If splicing is the action, the overlay is the subject you’re performing that action on. Let’s clear this up.
Overlay vs. Main Track — What’s the Difference?
Your main track is the foundation — the primary footage that runs along the bottom of your timeline. Everything builds on top of it.
An overlay is any additional video, image, or visual element placed on a separate track above your main footage. It plays simultaneously with your main video, layered on top of it. If you’ve ever seen a reaction video where someone’s face appears in a small box in the corner — that’s an overlay. If you’ve seen a cinematic video with a color-graded texture layered over the footage — that’s also an overlay.
The best way to picture it: imagine your main video is a printed photograph. An overlay is like placing a piece of transparent film on top of that photo. You can draw on the film, color it, cut pieces out — and the original photo underneath stays completely untouched.
Types of Overlays You Can Use in CapCut PC
CapCut gives you a generous range of overlay options, even on the free version:
- Video overlays — b-roll footage, secondary camera angles, screen recordings
- Image overlays — PNG or JPG files, logos, watermarks, graphic elements
- Text overlays — titles, subtitles, lower thirds, animated captions
- Sticker and animated overlays — CapCut’s built-in library of motion graphics
- Color and texture overlays — film grain, light leaks, color washes applied using blend modes
Each type behaves the same way on the timeline, which means once you learn how to splice one, you can splice all of them.
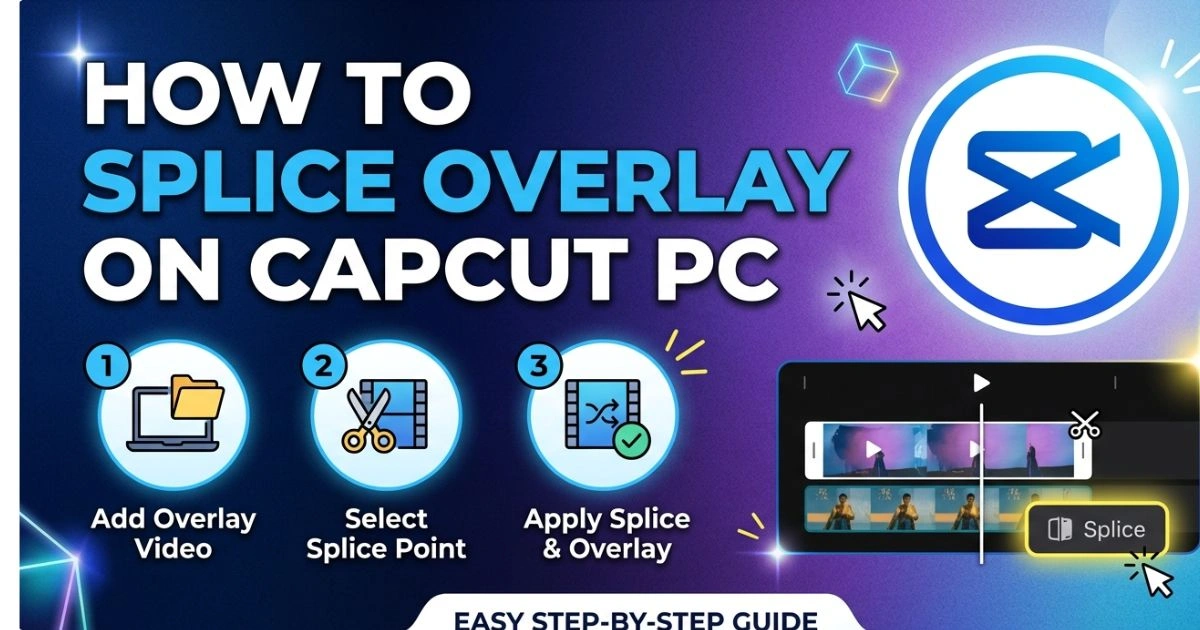
How to Splice Overlay on CapCut PC — Step-by-Step
This is the section you came here for. Follow each step carefully, and don’t rush — precision matters more than speed when you’re learning.
Step 1 — Download and Open CapCut on PC
If you haven’t already installed CapCut on your computer, go to the official CapCut website (capcut.com) and download the PC version. It’s available for both Windows 10/11 and Mac. The installation is straightforward — no extra software or plugins needed.
Once installed, open CapCut and click New Project on the home screen. This creates a fresh editing workspace.
Step 2 — Import Your Main Video Footage
On the left panel, you’ll see an Import button. Click it, browse to your video file, and select it. CapCut supports most common formats including MP4, MOV, AVI, and MKV, so you shouldn’t run into compatibility issues with standard footage.
After importing, drag your video from the media panel down to the main timeline at the bottom of the screen. You’ll see it snap into place as your primary clip.
Alternatively, you can drag and drop directly from your file explorer into the CapCut import panel — whichever feels more natural to you.
Step 3 — Add an Overlay to Your Timeline
Here’s where the layering begins. Look at the left-side panel in CapCut — you’ll find an option labeled Overlay. Click it.
A sub-panel appears with an Add Overlay button. Click that, then choose the file you want to use as your overlay — a video clip, an image, whatever you have in mind.
Once added, notice what happens in your timeline. Your main video sits on the primary track at the bottom, and your overlay appears on a separate track floating above it. This visual separation is what lets CapCut treat them as independent layers.
Step 4 — Position and Resize the Overlay
In the preview window (the large screen in the center of CapCut), you’ll see your overlay sitting on top of your main video. At this point, it might be covering the entire frame, or it might appear at an unexpected size.
To reposition it, simply click and drag it anywhere on the preview canvas. To resize, grab one of the corner handles and drag inward or outward. Hold Shift while resizing if you want to maintain the aspect ratio and avoid stretching.
You’ll also find Flip and Rotate options in the right-side property panel whenever your overlay is selected — useful for mirroring footage or correcting orientation issues.
Step 5 — How to Splice (Split) the Overlay
This is the most important step, and it’s also where most beginners make their first mistake. Read this carefully.
First, move the playhead — the thin vertical line that shows your current position in the timeline — to the exact moment where you want to make your cut. You can click anywhere on the timeline ruler to jump the playhead to that position, or press the left and right arrow keys to nudge it one frame at a time for precision.
Second, click directly on your overlay track to select it. You’ll know it’s selected when a colored border (usually yellow or orange) appears around that segment. This step is non-negotiable. If you don’t select the overlay track specifically, CapCut will split whatever track is currently active — which might be your main video instead.
Third, press Ctrl + B on your keyboard. Your overlay is now split into two separate segments at exactly the point where your playhead was sitting.
That’s it. Two pieces. Full control over each one.
You can now:
- Delete the second half by selecting it and pressing Backspace
- Move the segments apart to insert another clip between them
- Trim each segment independently by dragging their edges
- Apply different effects or opacity levels to each half
If you prefer not to use keyboard shortcuts, you can also click the Scissors icon that appears in the toolbar above the timeline whenever a clip is selected.
Step 6 — Adjust Timing and Duration After Splicing
After splicing, take a moment to zoom into your timeline for a closer look. Use Ctrl + Scroll Up to zoom in, which gives you more granular control over where things sit.
Drag the edges of each overlay segment to fine-tune their start and end points. The goal is usually to sync your overlay cuts with specific moments in the main video — a beat drop in the music, a scene change, a spoken word, a visual cue.
CapCut has a subtle snap behavior that makes segments “stick” to the playhead position or to the edges of neighboring clips. This is helpful most of the time, but if it’s causing frustration, you can disable snapping in the timeline settings.
Step 7 — Apply Blend Modes to the Overlay
This step is optional, but once you discover blend modes, you’ll use them constantly.
With your overlay selected, look at the right-side panel for a dropdown labeled Blend Mode. By default it’s set to Normal, which simply places the overlay on top of everything below it at whatever opacity you’ve set.
Changing the blend mode tells CapCut how the overlay’s pixels should interact with the pixels of your main video:
- Screen — great for light elements like fire, smoke, and lens flares; makes black areas transparent
- Multiply — darkens the combined image; good for shadows and textures
- Overlay — increases contrast and saturation; popular for cinematic color grades
- Lighten — only shows pixels from the overlay that are brighter than the main video
Experiment with these on a color wash or texture overlay and you’ll immediately understand why so many cinematic-style videos look the way they do.
Useful Keyboard Shortcuts for Splicing Overlays in CapCut PC
Memorizing even a handful of these will cut your editing time dramatically.
| Action | Keyboard Shortcut |
|---|---|
| Split / Splice clip | Ctrl + B |
| Undo last action | Ctrl + Z |
| Redo action | Ctrl + Y |
| Play / Pause preview | Spacebar |
| Zoom in on timeline | Ctrl + Scroll Up |
| Zoom out on timeline | Ctrl + Scroll Down |
| Select all clips | Ctrl + A |
| Delete selected clip | Delete / Backspace |
| Move playhead left | Left Arrow |
| Move playhead right | Right Arrow |
Common Mistakes Beginners Make When Splicing Overlays
Knowing what goes wrong is just as valuable as knowing what to do right.
Mistake 1 — Splitting the Wrong Track
You press Ctrl+B expecting to cut your overlay, and instead your main video gets split. This happens because you forgot to click the overlay segment first to select it.
The fix: Before every split, glance at your timeline and confirm which track has the yellow/orange highlight border. If it’s not your overlay, click the overlay clip first, then split.
Mistake 2 — Overlay Out of Sync With Main Video
Your overlay cut happens a second too early or too late, and the visual timing feels off.
The fix: Zoom into your timeline using Ctrl + Scroll Up until you can see individual frames. Use the arrow keys to nudge your playhead one frame at a time until it lands exactly where you want the cut. Precision is easier when you can actually see the frames.
Mistake 3 — Overlay Disappears After Splicing
You split your overlay, and one of the segments suddenly becomes invisible in the preview.
The fix: Check the opacity slider in the right-side panel. It might have been accidentally dragged to zero. Also check that you didn’t accidentally delete the segment — press Ctrl+Z to undo and see if it comes back.
Mistake 4 — Jagged or Abrupt Overlay Transitions
Your overlay pops on and off the screen with no grace — it just appears and disappears hard-cut, which looks amateur.
The fix: After splicing, select the overlay segment and go to the Animation tab in the right panel. Add a short fade-in (0.3–0.5 seconds) to the beginning and a short fade-out to the end. This alone makes a dramatic difference in how polished your video feels.
Pro Tips for Better Overlay Splicing in CapCut PC
Once you’ve got the basics down, these habits will push your editing to the next level:
- Make multiple rapid cuts first, then clean up. Use Ctrl+B several times across an overlay to divide it into many segments, then delete the ones you don’t need. This is faster than trying to be precise with a single cut.
- Always work on a duplicate project. Before experimenting with a new technique, duplicate your project from the home screen. This gives you a safety net if something goes wrong.
- Use the zoom feature constantly. Most timing errors come from working zoomed too far out. Zoom in whenever you’re placing a cut — it’s the single biggest habit that improves editing precision.
- Combine spliced overlays with transitions. After splitting your overlay into segments, add CapCut’s built-in transitions between them. Even a subtle dissolve or dip to black makes scene changes feel intentional rather than accidental.
- Export at 1080p minimum. Overlay quality — especially image-based overlays — degrades noticeably at lower resolutions. Even if your main footage is 720p, keep the export resolution at 1080p.
How to Export Your Final Video After Splicing Overlays
When you’re done editing, click the Export button in the top right corner of CapCut. Use these settings as your starting point:
| Setting | Recommended Value |
|---|---|
| Resolution | 1080p (1920×1080) |
| Frame Rate | 30fps (match your source footage) |
| Format | MP4 |
| Quality | High (20–30 Mbps bitrate) |
| Color Space | SDR / BT.709 |
For most social media platforms — YouTube, Instagram, TikTok — these settings produce excellent quality without creating unnecessarily large file sizes.
FAQ — How to Splice Overlay on CapCut PC
Can I splice an overlay without affecting the main video track in CapCut PC?
Absolutely. As long as you select only the overlay track before pressing Ctrl+B, your main video remains completely untouched. CapCut operates on whichever track is highlighted at the time of the split — so selective clicking is your best tool.
How do I splice overlay on CapCut PC using only the mouse?
Click your overlay segment to select it, move your playhead to the desired cut point, then click the Scissors icon in the toolbar that appears above the timeline. No keyboard required.
Why is my overlay not splitting when I press Ctrl+B on CapCut PC?
Your overlay track is almost certainly not selected. Look at your timeline — if you don’t see a colored border around the overlay segment, click it once to activate it, then press Ctrl+B again.
Can I splice multiple overlays at the same time in CapCut PC?
Not simultaneously. CapCut PC requires you to split each overlay track one at a time. If you have several overlays running in parallel, you’ll need to select and split each one individually.
Is CapCut PC free for splicing and overlay editing?
Yes — completely free. All core editing features including splitting, overlays, blend modes, and animations are available without any subscription. CapCut Pro unlocks premium asset libraries (specific stickers, templates, AI tools), but nothing in this guide requires it.
How do I create smooth transitions when splicing overlays on CapCut PC?
After splitting your overlay, select each segment and open the Animation panel on the right side. Apply a fade-out to the end of the first segment and a fade-in to the start of the second. For even smoother results, add a CapCut transition effect between the two segments directly in the timeline.
Conclusion
Here’s the honest truth about learning video editing: the tools aren’t the hard part. The hard part is pushing through those first few sessions where nothing does what you expect it to do. But now you have something most beginners don’t — a clear, step-by-step understanding of not just what to click, but why each action matters.
You know that splicing creates two independent segments without deleting anything. You know that overlays are separate layers that sit above your main footage. You know that the single most important habit before every split is selecting the right track first. And you know that a simple fade animation is the difference between a cut that looks accidental and one that looks intentional.
That’s real knowledge. It doesn’t disappear after you close this tab.
So here’s your challenge: open CapCut right now, import any clip you have on hand — even 30 seconds of random footage — and practice splicing an overlay from start to finish. You don’t need perfect material. You just need the repetition.
Did this guide help you? Drop a comment below sharing what you created, or share this article with someone who’s been struggling with CapCut. The editing community grows when people stop hoarding knowledge and start passing it forward.
Now go make something worth watching.