
How to Connect P500 Pedals to PC: Powerful Setup Tutorial
Table of Contents
You finally unbox your P500 pedals. The weight of them in your hands tells you immediately — this is serious hardware. The machined metal, the firm resistance of the brake pedal, the precision engineering under your fingertips. For a moment, you just hold them and imagine what your lap times are going to look like.
Then you sit down at your PC.
And you stare at the cables.
That gap between excitement and confusion is something every sim racer knows. You didn’t spend good money on high-performance pedals to get stuck at the setup stage. You bought them to feel the road, the braking zones, the threshold — not to spend an evening wrestling with driver software and USB ports.
This guide closes that gap completely.
By the time you finish reading, your P500 pedals will be connected, calibrated, and ready to perform. Whether you’re going through USB directly or routing through a wheelbase via RJ12, every step is laid out clearly. No technical background required. Just follow along, and you’ll be on track before the day is out.
What Are P500 Pedals? A Quick Overview
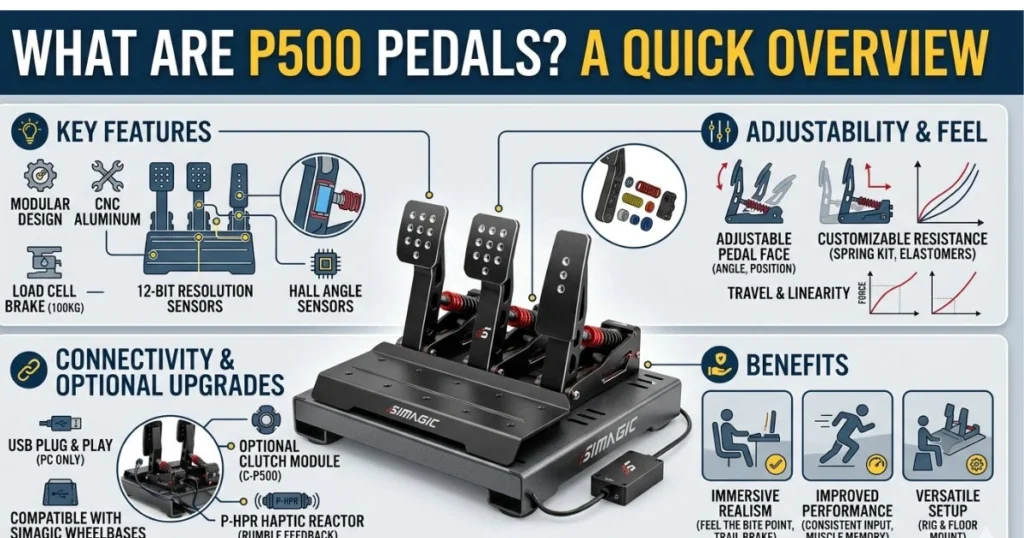
Key Features That Make P500 Pedals Stand Out
The P500 pedals sit in a category of load cell hardware designed for drivers who want their sim experience to mirror real-world feedback as closely as possible. Unlike standard potentiometer-based pedals that measure position, load cell brake systems measure actual force — meaning how hard you press, not just how far.
That distinction matters enormously. In a real car, your foot doesn’t travel far when you brake hard. You push with force. The P500 replicates that behavior, which trains your muscle memory in a way that translates to genuine improvement behind a real wheel.
Key features include:
- Load cell brake technology — pressure-sensitive, not position-sensitive
- Adjustable brake force — customize resistance to match your preference
- Durable construction — built for sustained sim rig use
- Multi-platform support — compatible with PC, and select console platforms via wheelbase
- RJ12 connectivity — integrates with compatible wheelbases for unified control
Why Proper PC Connection Is Non-Negotiable
Here’s something most setup guides skip over: a bad connection doesn’t just cause inconvenience — it actively degrades your performance. Miscalibrated axes create dead zones where input isn’t registered. Skipped driver installation leads to inconsistent pedal behavior. Using the wrong USB port introduces latency that you’ll feel as a vague “wrongness” in your braking that’s hard to diagnose.
Getting the connection right from the start means you’re building on a stable foundation. Everything else — sensitivity tuning, in-game setup, lap time improvements — depends on it.
What You Need Before You Start — Complete Checklist
Before you touch a cable, run through this checklist. Skipping preparation is the single biggest reason setups go sideways.
Hardware Requirements
| Item | Purpose | Required? |
|---|---|---|
| P500 Pedals | Core input device | ✅ Yes |
| USB Cable (included) | Direct PC connection | ✅ Yes |
| RJ12 Cable | Wheelbase connection method | Optional |
| Sim Rig or Mounting Plate | Stability during use | Strongly Recommended |
| PC — Windows 10 or 11 | Software and driver environment | ✅ Yes |
| Screwdriver set | Mounting to rig | If using sim rig |
Software Requirements
You’ll need the following before or immediately after connecting your pedals:
- Official manufacturer driver (Fanatec driver package if using Fanatec ecosystem)
- Windows Game Controllers utility — built into Windows, accessed via joy.cpl
- Optional: SimHub for telemetry and input visualization
- Optional: x360ce or vJoy if specific games don’t natively recognize the device
Quick Pre-Setup Tips
- Update Windows to the latest build before beginning
- Plug directly into a USB port on your motherboard — avoid hubs
- If you have a USB 3.0 port available, use it
- Temporarily disable antivirus during driver installation if it flags the package
- Restart your PC after driver installation, before plugging in the pedals
How to Connect P500 Pedals to PC — Step-by-Step Guide
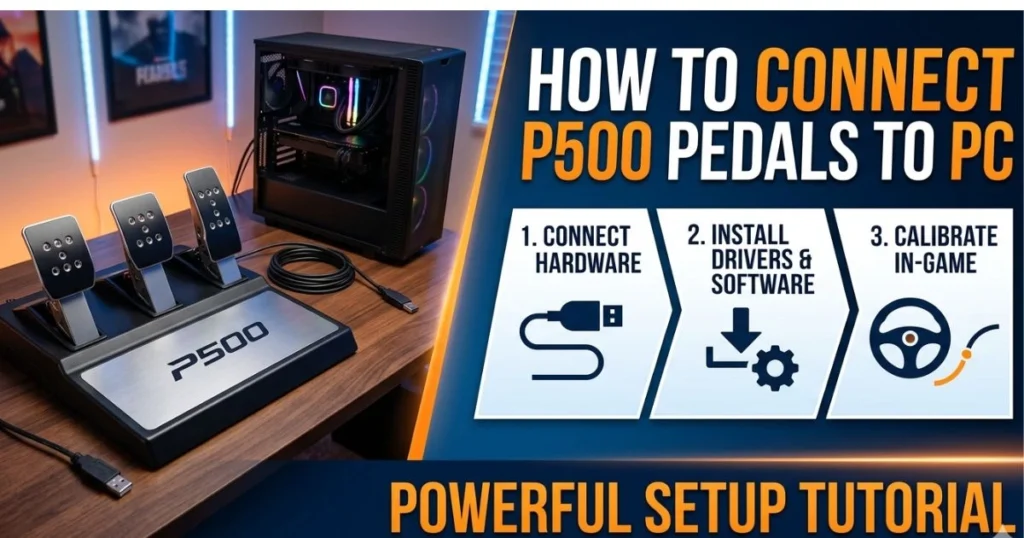
This is the core of what you came here for. Follow each step in sequence and don’t skip ahead.
Step 1 — Unbox and Inspect Your P500 Pedals
Before anything gets plugged in, spend two minutes on inspection. Lay your pedals out on a flat surface and check:
- All cables are present and undamaged
- The USB port on the pedal unit is clean and unobstructed
- The load cell brake pedal moves smoothly without grinding
- No visible damage from shipping — particularly to the frame corners and cable connectors
If anything looks off, document it with photos before proceeding. Hardware faults are easier to address before you’ve started installation.
Step 2 — Install the Required Drivers First
This step is critical and it must happen before you connect the pedals to your PC. Installing drivers after connecting often causes Windows to assign generic drivers that create conflicts later.
Here’s how to do it correctly:
- Go to the official manufacturer website (Fanatec.com for Fanatec products)
- Navigate to the Support or Downloads section
- Select your pedal model — P500 — and your operating system
- Download the latest driver package
- Run the installer as Administrator
- Follow all prompts, accepting default installation paths
- When prompted, restart your PC fully — not just sleep or hibernate
- After restart, confirm the driver appears in Device Manager under Human Interface Devices
Only after this restart should you plug in your pedals.
Step 3 — Physically Connect the P500 Pedals to Your PC
With drivers installed and your PC restarted:
- Locate the USB port on your P500 pedal unit (typically on the left side or rear of the unit)
- Connect one end of the included USB cable to the pedal unit
- Connect the other end to a USB port directly on your PC — not a hub
- Listen for the Windows device detection sound
- Watch for a notification in the bottom right of your screen confirming the device was recognized
If Windows stays silent and nothing appears, try a different USB port. If it still doesn’t respond, jump ahead to the Troubleshooting section.
Step 4 — Verify the Connection in Windows
Once connected, you need to confirm Windows is reading the pedal inputs correctly.
Do this:
- Press Windows + R to launch the Run dialog box.
- Type joy.cpl and press Enter
- The Game Controllers window opens — look for your P500 pedals in the list
- Select the device and click Properties
- In the Properties window, press each pedal and watch the axis indicators respond in real time
You should see:
- Throttle moving one axis
- Brake moving a second axis
- Clutch (if equipped) moving a third axis
If all three respond and the bars move smoothly from minimum to maximum, your physical connection is solid.
Step 5 — Calibrate Your P500 Pedals in Windows
Raw connection isn’t enough — you need calibration so Windows maps the full range of each pedal correctly.
In the same Properties window:
- Click the Settings tab, then Calibrate
- The Calibration Wizard launches
- Follow the on-screen instructions — you’ll be asked to press each pedal to its full extent and release it fully
- Do this slowly and deliberately for each axis
- Complete the wizard and click Finish
- Return to the Test tab and verify the axes now travel the full range from 0% to 100%
This step eliminates dead zones at the top and bottom of each pedal’s travel, giving you the full input range the hardware is capable of.
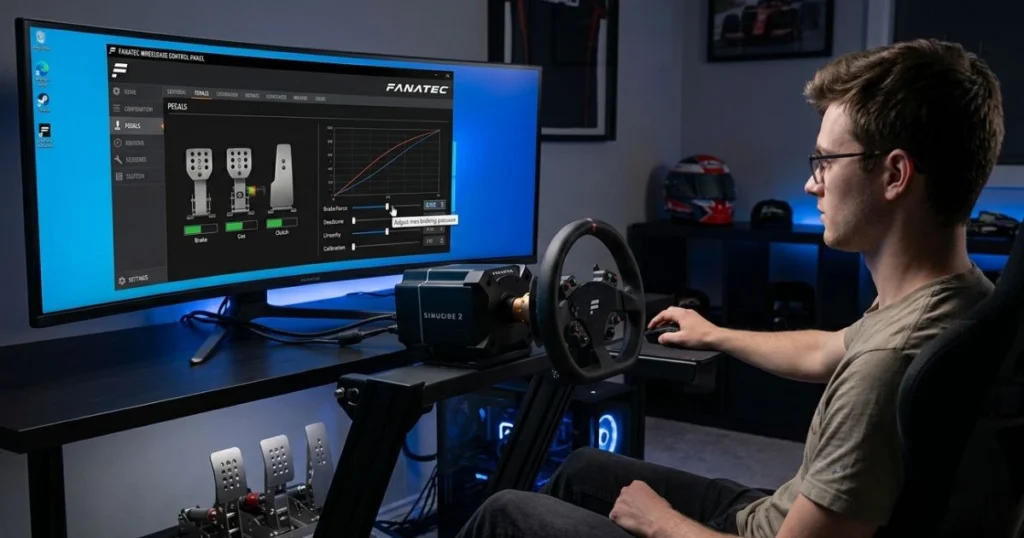
Step 6 — Fine-Tune Settings in the Manufacturer Software
The Windows calibration is your baseline. The manufacturer software is where you get precision.
Open the Fanatec Control Panel (or your specific manufacturer’s equivalent):
- Brake Force (BRF): This setting controls how much physical pressure is needed to reach 100% brake input. Higher values mean a firmer pedal. Start around 50-60 and adjust from there based on your driving style
- Throttle Linearity: A linear curve means input = output directly. A progressive curve means the pedal response builds gradually — useful for high-power cars
- Deadzone settings: Keep these at zero unless you have a specific hardware reason to add them
- Save your profile before closing the software
With this step complete, your P500 pedals are fully connected and configured via USB.
How to Connect P500 Pedals to PC via RJ12 — Wheelbase Method
If you’re running a compatible wheelbase — such as the Fanatec CSL DD, GT DD Pro, or Podium series — connecting through RJ12 rather than USB has real advantages.
When to Use RJ12 Instead of USB
- You want to free up a USB slot on your PC
- You prefer managing all sim hardware through one unified software dashboard
- Your wheelbase supports pedal integration and firmware sync
- You want the wheelbase to handle pedal power delivery
Step-by-Step RJ12 Connection
- Power off your wheelbase completely — this is important, hot-plugging can cause detection issues
- Locate the RJ12 cable — it resembles a wider telephone cable
- Connect one end to the RJ12 port on your P500 pedal unit
- Connect the other end to the pedal input port on your wheelbase
- Power the wheelbase back on
- The wheelbase firmware detects the pedals automatically
- Open your manufacturer’s driver software — you should see the pedals listed under the wheelbase device
Configuring Pedals Through the Wheelbase Software
In this setup, the wheelbase acts as the data bridge between your pedals and PC. Configuration happens in the same software panel but under the wheelbase device rather than a separate pedal entry. Check:
- Pedal firmware version — update if behind current release
- Brake force settings carry over from the unified dashboard
- Test inputs through joy.cpl still work — the wheelbase registers as the primary device
Connecting P500 Pedals to Specific Sim Racing Games
Your PC recognizes the pedals. Now your games need to as well.
Assetto Corsa Competizione
- Launch ACC and go to Options → Controls
- Select Wheel & Pedals as your input type
- Under Axis Assignment, click each axis field and press the corresponding pedal
- For the brake, set Brake Gamma between 1.8 and 2.4 to account for load cell feel
- Test in a practice session and refine gamma to taste
iRacing
- Go to Options → Controls
- Enable Use Separate Brake Axis if not already active
- Assign throttle and brake axes by clicking each field and pressing the pedal
- In Brake Force Factor, start at 0.9 and adjust — load cell brakes in iRacing need this tuned carefully
- Enable Auto-Clutch unless you’re using your clutch pedal manually
F1 2024 / EA Sports F1 Series
- Go to Game Options → Settings → Controls, Vibration & Force Feedback
- Select your wheel/pedal configuration
- Under Calibration, run the axis calibration within the game itself
- Set Throttle Linearity to 0 and Brake Linearity to slight positive (5-10) for load cell behavior
BeamNG.drive and Other Titles
Some older or indie sim titles don’t natively support direct axis assignment. In these cases:
- Try vJoy to create a virtual joystick device that maps your pedal axes
- Use x360ce to emulate an Xbox controller, mapping your pedals to trigger axes
- In BeamNG specifically, go to Options → Controls → Bindings and search “throttle” and “brake” to assign directly
Troubleshooting — P500 Pedals Not Working on PC
Even clean setups hit issues. Here’s how to diagnose and fix the most common ones fast.
Common Problems and Fixes
| Problem | Likely Cause | Fix |
|---|---|---|
| Pedals not detected at all | Driver not installed properly | Reinstall driver, restart before connecting |
| Axes not moving in joy.cpl | Loose or faulty USB connection | Try different USB port or cable |
| Brake axis reversed | Calibration inversion | Recalibrate or invert axis in game settings |
| Pedals detected but no input registers | Outdated firmware | Update via manufacturer software |
| Input lag or stuttering | USB hub interference | Connect directly to motherboard port |
| Only one axis visible | RJ12 not seated fully | Unplug cable, re-seat firmly on both ends |
| Game ignores pedals | In-game axis not assigned | Re-do in-game axis assignment from scratch |
| Software crashes on open | Driver version mismatch | Download and install the latest full driver package |
How to Update P500 Pedal Firmware
Outdated firmware is behind more problems than most people realize. Here’s how to update it:
- Open the manufacturer software (Fanatec Control Panel)
- With pedals connected, navigate to the Firmware Update section
- The software checks your current version against the latest available
- If an update is available, click Update
- Do not unplug your pedals or shut down during this process
- Wait for the completion confirmation — typically 2 to 4 minutes
- Restart the software and verify the new firmware version appears
When to Contact Support
Reach out to official manufacturer support if:
- The load cell brake shows no resistance at all and calibration doesn’t fix it
- The pedal unit gets warm during use
- Firmware update fails repeatedly
- Physical damage is visible inside the unit
Document your issue with video before contacting support — it speeds up resolution significantly.
Advanced Tips to Get the Most Out of Your P500 Pedals
Once everything is connected and working, these steps push your setup from functional to exceptional.
Setting Custom Brake Force Curves
A linear brake curve means every percentage of pedal press delivers exactly that percentage of braking power. For load cell pedals, a slightly progressive curve often feels more natural and mirrors real-world hydraulic brakes more closely.
In your manufacturer software:
- Try a curve that starts slightly soft in the first 20% of travel
- Builds progressively through mid-range
- Reaches 100% just before maximum pedal force
This makes trail braking — gradually releasing brake pressure as you turn in — far more controllable.
Using SimHub for Telemetry Overlay
SimHub gives you a real-time visual trace of your throttle and brake inputs overlaid on your driving view. This is one of the fastest ways to identify where you’re braking too early, not releasing cleanly, or applying uneven pressure.
To set it up:
- Download and install SimHub from the official website
- Connect it to your sim title via the game profile selector
- Enable the Pedals Overlay widget
- Drive a few laps and review your input trace
Patterns become obvious quickly. Overlapping braking with throttle application, late releases, sharp spikes — all visible at a glance.
Mounting Your P500 Pedals for Best Performance
Your pedal positioning affects how naturally you can apply load cell brake force. Key points:
- Heel rest height should allow your heel to sit flat with the foot slightly angled upward
- Brake pedal distance should place maximum force application at a natural foot angle — not at full leg extension
- Side-to-side spacing between throttle and brake should match your natural foot width
- On a sim rig, bolt the pedal plate down firmly — any movement under hard braking disrupts your pressure reference point
Maintaining Your P500 Pedals Long-Term
- Clean the load cell surface every few months with a dry cloth — no liquids near the sensor
- Check cable routing periodically — avoid sharp bends near connectors
- Store the firmware update history so you know what version you’re running
- If you transport the rig, remove the pedals and pack them separately — frame stress can affect load cell calibration over time
Conclusion
You’ve now walked through every aspect of connecting your P500 pedals to PC — from driver installation and USB setup to RJ12 wheelbase routing, in-game configuration, troubleshooting, and advanced tuning.
The process isn’t complicated when it’s laid out clearly. Install the driver first. Connect the hardware. Verify through joy.cpl. Calibrate properly. Configure in-game. Then step back and let the hardware do what it was built to do.
Your P500 pedals are now an extension of your instincts. The load cell brake will reward consistency and punish sloppiness — which is exactly what makes it the best training tool you can put in your sim rig.
Keep your firmware updated, check your calibration periodically, and don’t be afraid to revisit your brake force curve as your driving develops. The setup isn’t a one-time task — it evolves with your skill.
Now close this guide, load a session, and drive.
FAQ — Connecting P500 Pedals to a PC
Can I connect P500 pedals to PC without installing drivers? Technically, Windows may assign a generic HID driver and partially recognize the device, but you’ll lose access to load cell sensitivity adjustments, firmware updates, and proper axis calibration. Always install the manufacturer driver first for full functionality.
How do I connect P500 pedals to PC using USB? Plug the included USB cable into the pedal unit and connect the other end to a USB port directly on your PC. Make sure drivers are installed before connecting. Verify detection via joy.cpl by pressing Windows + R and typing joy.cpl.
Why are my P500 pedals not showing up on PC? The three most common reasons are: driver not installed before connecting, using a USB hub instead of a direct motherboard port, or firmware incompatibility. Try reinstalling the driver, switching to a direct USB port, and updating firmware through the manufacturer software.
Do P500 pedals work on Windows 11? Yes. P500 pedals are compatible with Windows 11 provided you install the latest driver package. Always download drivers directly from the manufacturer’s website rather than relying on Windows Update for sim hardware.
How do I calibrate P500 pedals on PC? Open joy.cpl via Windows Run (Win + R), select your pedals, click Properties, then Settings, then Calibrate. Follow the wizard, pressing each pedal to its full extent when prompted. Finish the setup wizard, then verify the axes in the Test tab.
Can I use P500 pedals on PC and console? P500 pedals connect to PC directly via USB. Console use typically requires a compatible wheelbase that bridges the connection — standalone USB to console is not supported on most current platforms due to licensing restrictions.
What is the difference between USB and RJ12 connection for P500 pedals? USB connects pedals directly to your PC as an independent device. RJ12 routes the pedal data through a compatible wheelbase, freeing up a USB slot and allowing unified configuration through a single software dashboard. Both methods deliver the same input quality — the choice depends on your hardware setup.